Showing posts with label Exclusive Content. Show all posts

2.19.2013

Mixed Media on your Layouts


Have you guessed by now what my favourite technique is in scrapbooking? Do you have one? A friend of mine says that her favourite technique is gluing paper to other paper. :rolleyes: Mine is using mixed media on scrapbook pages, and what's exciting about that for me is trying out something new, not knowing exactly how it will turn out.

Take for example my page using February's Risk kit, Try:


A friend and I were browsing in one of my favourite art/scrapbooking stores and I found some glass bead gel and had to try it for myself. I love putting media through stencils to create raised patterns.

Here's a close up:


See those triangles that shimmer? That shimmer is tiny glass beads in the clear gel. You can always add colours to the gels, or pastes to create a whole new look, without any additional cost. I love embellishing my scrapbook layouts using something inexpensive, don't you?

If you want to give it a try, it's as easy as getting a trial size of an art medium, or taking a shot, and buying something that looks like fun. Show us what new art medium you've used lately! 


1.22.2013

Let 'Er Rip by Lori Wilbanks

New design team member Lori Wilbanks is sharing with us on the blog today one of her specialties... ripping up paper!

Let's take a read, shall we?

---------------------------------

Well, I admit it, I am a messy crafter!
Okay, so that's not much of a confession, but I have to tell you, sometimes a little mess just makes me happy!
I want to share a little technique with you that may make some of you a little nervous...that's okay! 

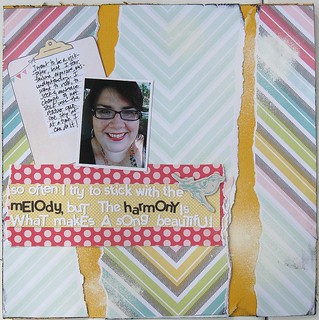
Often in my scrapping and art journaling, I find that ripping that paper up is just the look I want!


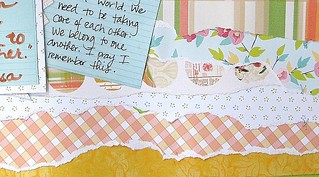
I think this torn paper helps add to the idea that we are not always harmonious and careful with each other. 


Now, I know what some of you are thinking..."but my beautiful patterned paper!!!" Look, you can carefully use your trimmer and save most of that 12x12 sheet, but I'm telling you, a little tearing can be quite a stress reliever! 

i don't use this technique on everything, but I find I really like that distressed look....plus I have a hard time making all my lines and elements straight....sigh.

For this layout, I really wanted again to show kind of the "opposite" of harmony....the ripped edges helped create a little chaos on the page. Plus I really wanted the monotone contrasting to color to show up. I love that yellow popping through.


So, your challenge is to try a little tearing! i want to hear the glorious sound of ripping paper echoing throughout the land!

1.15.2013

Shabby Flowers with Kiki Halbert

We have new design team member Kiki Halbert on the blog with us today sharing some of her "shabby" expertise. Let's see how she is dressing up her "inside out" layouts using the contents from the January kit HARMONY.

--------------

I adore flowers. No layout is complete with at least a few flowers. They are my go-to embellishment for giving a layout its final touches.

So imagine the irony when I was actually nervous making my own flowers. When I started scrapbooking I didn't have any fancy die cutting machine, so I stuck with using pre-made flowers. I figured that making my own shabby flowers would be complicated and I would mess them up. Oh, how I was right...but in a good way!

It's a simple but fun thing to do when you need a little something on your layout and have leftover paper scraps from the kit.

Now, for a couple of my layouts, I did use a die cutting machine:


I used a couple of paper scraps to create the paper flowers with some small brads to secure them. I like to crumble them up for some texture, and even brush the creases with Vintage Photo distress ink for some extra dimension.

For the layout below, I used some simple flowers in my stash and used one of the charms to make some whimsical centers for the flowers by taking the charm apart. On one flower I used the pompom, and on another I used a crystal.


On this following layout though, I created my own really shabby flowers by cutting rough circles out of paper scraps, and then sprayed the circles with water lightly.


I scrunched the paper in my hand to give it a really shabby feel. I then layered the scrunched papers while they were still damp and formed them into a flower shape, and set a brad in the middle to keep the two layers together. Once the layers dry, they stay in that shape very well. And there you have it...two very shabby flowers.


12.27.2012

Using Vellum with Diana Brodeur


I was cleaning, or should I say reorganizing, my scrapbooking stash when I came across a couple sheets of vellum that I forgot I had. I kept them out so I could use them on some layouts. I decided to start printing my journaling on them. I love how it still allows you to see the patterned paper underneath and how clean and fresh it looks. Now I can't seem to get enough of vellum!

For this kit, I used vellum journaling on two of my layouts. This one....


And this one...


You should give it a try. I think you will love it too! 

-----------------------------------------

Here are some tips on adhering your vellum, as discussed on our SFTIO Forum:

1. You can use an adhesive specifically for vellum. There is spray, glue dots and tape runners.

2. Use a very small amount in the corners. It might still show through, though.

3. Use staples or brads.

4. Stitching! 

5. Or use a very thin line of glue around all the edges. It will give a cool "matte" look. 


12.26.2012

Hand Cut with Mary Jo Rhoda


A common thread I noticed in all of my pages using this month's Release kit, is how I love to cut pieces from patterned paper!


For Set Them Free, I cut a sunburst style block from the "Chestnut Boutique" paper by Crate Paper. The line also has a fabulous piece of patterned paper with faux tape strips on it (Pistachio Market). I actually hand cut several of those pieces for a different layout as well! The white boxes for my journaling and title were cut from the American Crafts "Think Good Thoughts" paper. Very handy and easy!


I cut a large flower from the "Almond Grove" patterned paper by Crate Paper to accent my photo in this simple style layout. I loved the large floral paper, but found it hard to use in large portions. And now I have several smaller flower embellishments all cut from one single piece of paper.


More faux washi tape strips cut from the "Pistachio Market" paper by Crate Paper.


And finally, the big one! Lots of hexagon shapes cut from the "Tradition" patterned paper by Cosmo Cricket.


I just love using bits and pieces of my patterned papers to use as embellishments!
Have you tried hand cutting portions of your kit papers to use as embellishments?

12.18.2012

Paper Strips with Nicole


Hi everyone! I just wanted to share a layout that I created using the December "Release" kit. I loved this kit because it had lots of great things in it and the Crate Paper is to die for! I loved the different strips of pattern on the paper, so I decided to just cut them out and place them on my layout. I added a few stickers as well to add a bit more color to my layout. I've been wanting to create a layout using paper strips and the Crate Paper made it easy! The strips were already there in the paper, I just cut them out and adhered them to my layout. And as for the title, I just LOVE it. I hand-painted the title using a paint brush and the gold Ranger ink! I must admit, as I was painting the title on my layout, I had butterflies in my stomach... The layout was completely done... except for the title so I could have easily messed the entire layout up  But, sometimes, trying something new can be fun!


11.15.2012

Technique Time with Kate


Hi everyone! I just want to share this neat technique where you can make a very cool 3D page element with just some patterned paper, a circle punch and some folding.


Here is a close up of the 3D circle/squares.


How to make your own
  • Punch out some circles from a double sided patterned paper with any circle punch (1", 1.5" or 2" look the nicest), I used 12 circles.
  • Now you will need to create a square template for your fold lines. You will only need 1 square.
  • For 1" circles, cut out a square that's about 0.7".
  • For 1.5" circles, cut out a square that's about 1".
  • For 2" circles, cut out a square that's about 1.4".
  • Place the square on top of one of the circles so that the sqare is centred inside of the circle.
  • Fold the circle along the edges of the square (fold along the red dotted lines in the image below).


  • Fold those edges toward the centre of the circle. Your cirlce should now be a square (I hope that makes sense!).
  • Repeat on the remaining circles.
  • Arrange in neat rows as shown on my layout.
Thanks for looking! I hope that this makes sense. Feel free to ask any questions. :) 


11.13.2012

November Sketch


Hi everyone!

Here is our sketch for November and my take on it. Hope you enjoy it. As always, let me know if you use it. :)

This one focuses on drawing from the frames found on the Teresa Collins paper, as well as incorporating a cute little banner. I've also given you a good chunk of space for journaling. 


Here is my layout based on the sketch:


Want more inspiration? Our Inspiration Page is free and industry exclusive. Be on the lookout for our monthly journaling prompts coming soon. We've also got a Pinterest Page and Music playlist, as well as, more beautiful design team layouts for your browsing pleasure.

Have a wonderful, creative day!


10.16.2012

October Sketches


Hello Inside Out lovelies!

Today I wanted to share with you a couple of sketches that I created for Exclusive Content. 

Don't know what Exclusive Content is?  

Then, you'd better come join or message board because there is so much to offer you and it's all FREE! How can you pass up FREE?

I will help you this time by sharing sketches on our blog. Then, I strongly advise you to come visit us and mingle on the message board. 


SFTIO sketches will always feature a wealth of journaling. Because of the nature our layouts tend to take, using the emotionally charged theme each month, we want to help you design layouts where you have plenty of room to express your thoughts.

Here is the layout I created inspired by this sketch:


Here is the second sketch:


And my layout:


The sketches I created are, by no means, something that you have to follow. But if you need that extra shove of inspiration, I hope that you find them helpful. If you use them, I'd love to see what you create! Combine them with our Challenges, which are posted on our forum

See you soon!


9.18.2012

Using Pre-Printed Layered Papers


This month's papers include a couple where a layered look is already printed right on it! They are full of beautiful textures, but without the bulk.

At first glace, they are gorgeous and exciting but after sitting looking at one I got nervous about what to add. It looks beautiful as is...

But don't be afraid to turn the paper, add more embellishments, create depth with layers and add journaling. It's really just a starting point!

Created by Jen Matott for Scrapbooking from the Inside Out

In this layout named"Guilty", I wanted to mimic the layered look of the pre-printed arrangement. The doily was perfect for placing a real textured item on a flat surface. 


Here's another layout where I used the pre-printed paper as a design element. In "Pure" I used the printed elements to frame the photo.


Don't forget that you can cut out the elements and use them as another layer. I like that they have started the design for you. The papers allow for flexibility and adding embellishments to personalize the page. .
How will you use the papers that already have layers started for you? 

Visit Jen's Blog by clicking here.
Visit the Design Team INNOCENCE gallery by clicking here.
Come join us on the forum for genuine community and more exclusive content here.