
Then come by and join our Message Board...we've got tons of these great how-tos ready for your creating pleasure! We love giving you FREE inspiration...we're just cool like that!
Using Texture Stamps
by Nancy
This month we have a very cool Prima texture stamp in the Anger kit. What’s a texture stamp? A texture stamp is any stamp that’s not a specific image... it’s more like a repeating pattern that you can use to add depth to your projects. Here are some texture stamps:

Sometimes it’s hard to think of ways to use texture stamps, since they’re not like a traditional image stamp. But there are lots of fun ways you can use texture stamps to give your crafts some extra “oomph.” Here are a few of my favorites:
Texture Technique #1: Ribbon
Supplies needed: stamp, ribbon, StazOn ink

Make sure you’re using Staz-On ink (or another solvent ink) for this technique, otherwise the ink will bleed on the fabric. Ink your stamp and place it over the ribbon as shown:

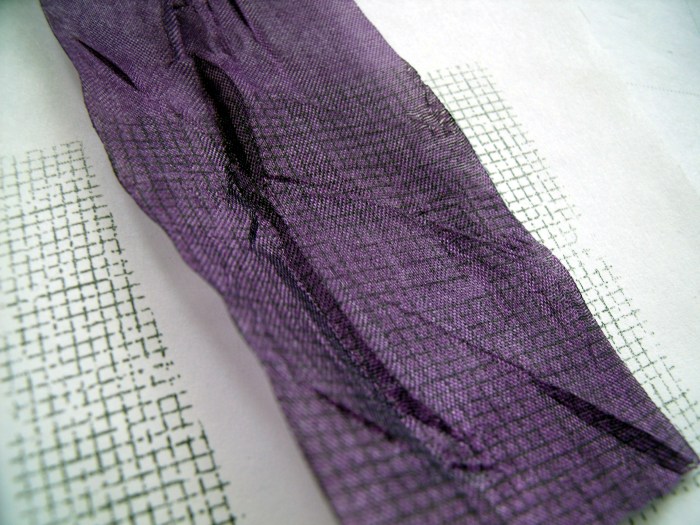
And voila! Pretty texture on your ribbon.

Texture Technique #2: Flowers
Supplies needed: stamp, ink, ribbon

Select an ink that’s similar in color to your flower, or try a watermark ink like Versamark. This technique adds a nice, subtle print to your flower.

Texture Technique #3: Foam
Supplies needed: Stamp, heat gun, foam embellishment

For this technique, I used the Artisan Elements foam from the Femininity kit, but you could use any kind of craft foam. Heat the foam until it swells a little, then quickly firmly press your stamp into the foam. Let it cool for about a minute, and remove the stamp. You can then ink the foam to highlight the texture.

Texture Technique #4: Chipboard
Supplies needed: stamp, StazOn ink, chipboard letters

I like to stamp just a bit of the image on to my letters, for a more subtle look.


Texture Technique #5: Stickers
Supplies needed: stamp, ink, stickers

Once again, it’s all about subtlety when you use just the corner of the stamp. I love this look for adding a color to stickers so they coordinate with the rest of your page.

Texture Technique #6: Resist
Supplies needed: stamp, watermark ink, embossing powder, heat gun, spray ink

Feel like getting messy? This technique’s for you! Begin by stamping and embossing the image onto cardstock, as shown:

Next, spray ink over the stamped area. Wipe over the embossed image with a tissue or baby wipe (or your finger!), removing the ink from the slick surface.

These are just a few ways to use texture stamps... there are infinite variations of these techniques! Try using different colors, embellishments, or surfaces. Good luck!
You can try these great ideas using our evocative, inspiring and cathartic ANGER kit.

Click HERE to read more and grab yours before they're all gone!
Love,
Rachel
3 comments:
oh great ideas!
Oh this is so good! I'm not the best stamper. They're always a challenge for me to think outside the box. Thanks Nancy!!!
I am not a stamper by any means, but this truly looks amazing and Nancy has made it look so easy! Maybe I will break out the stamps now and not let them intimidate me so!
Post a Comment